Top 10 CPR Training Manikins for Global Buyers

Time:2026-09-17 Author:Oliver
0%

Choosing the right Cpr Training Manikins is more than comparing prices, product photos, or shipping terms. For global buyers, each model must support realistic practice, consistent feedback, and dependable classroom use. A good manikin should show visible chest rise, provide accurate compression resistance, and tolerate repeated sessions without loose parts or damaged skin. It should also be easy to clean between learners.

Dr. Peter Safar, widely recognized as a pioneer of modern CPR, emphasized a practical principle: “Anyone, anywhere, can initiate CPR.” That idea still shapes effective manikin design. Training equipment should help beginners act quickly, while giving instructors measurable evidence of performance. Compression depth, release, hand position, ventilation volume, and timing are important details. Small errors matter. Some learners press too lightly. Others ventilate too forcefully.

This guide reviews the Top 10 CPR Training Manikins for Global Buyers through an operational lens. It considers anatomical realism, electronic feedback, child and infant options, airway features, replacement parts, sanitation, warranty support, and regional training needs. International purchasers also need to examine power compatibility, software languages, delivery reliability, and after-sales service. A low-cost unit may become expensive when sensors fail or spare lungs are unavailable.

No model is perfect.

The strongest choice depends on your students, teaching environment, budget, and maintenance capacity. We may overlook one detail, because real classrooms are rarely identical. That is why this comparison values practical evidence over impressive specifications. The goal is simple: help buyers select Cpr Training Manikins that make correct technique easier to learn, observe, and repeat.
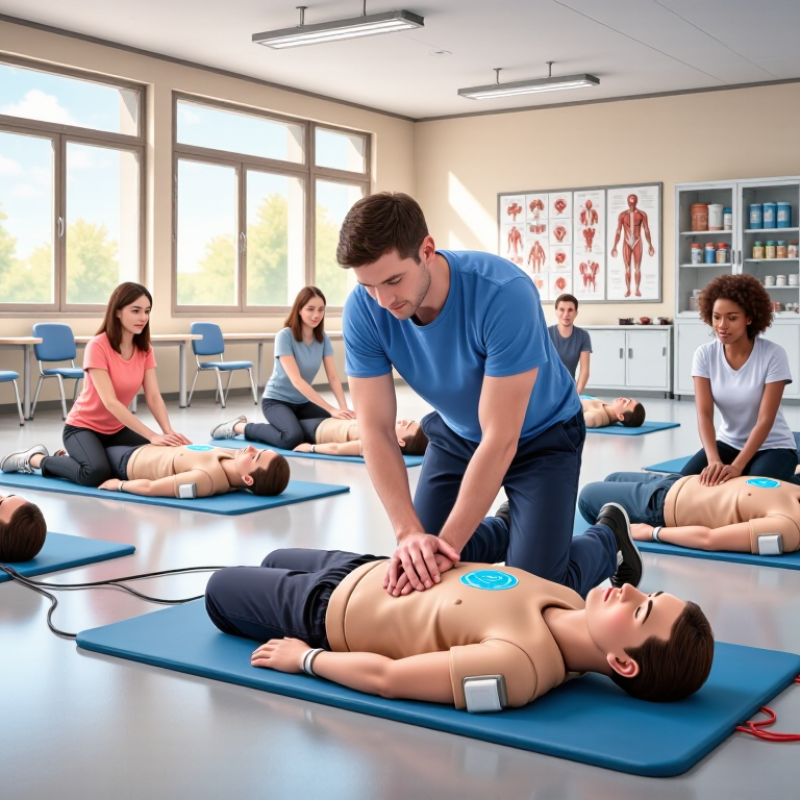
Top 10 CPR Training Manikins for Global Buyers

What Makes a CPR Training Manikin Suitable for Global Buyers

A CPR training manikin for global buyers must serve different classrooms, climates, and teaching habits.

The American Heart Association’s 2024 Heart Disease and Stroke Statistics Update reports over 356,000 out-of-hospital cardiac arrests annually in the United States. About 90% are fatal. Reliable practice equipment matters.

Look for realistic chest resistance, visible chest rise, and clear compression feedback. Feedback should measure depth, rate, recoil, and hand position. These features support current resuscitation guidance from the American Heart Association and European Resuscitation Council.

Durable skin materials also matter. A manikin may face frequent cleaning, rough transport, and hot storage rooms. Easy-to-replace lungs and face shields can reduce downtime.

However, “universal” design is often overstated. Body size, skin tone, language, and cultural expectations can still affect learner engagement.

Tips:

Check spare-part access before ordering. Confirm training compatibility, cleaning instructions, and local electrical requirements. Request evidence from independent testing, not only sales claims.

A lightweight model may reduce freight costs, but it can move during compressions. That small weakness deserves testing.

Buyers should also compare warranty coverage, technical support, and instructor training. The cheapest unit may become expensive after repeated repairs. For global programs, practical reliability usually matters more than impressive packaging.

Key Types of CPR Training Manikins and Their Main Uses

CPR training manikins vary by learner, practice goal, and training environment.

Adult torso manikins suit workplace courses, public safety classes, and hospital orientation. They provide a practical chest-compression surface and support repeated drills. Full-body manikins add head positioning, rescue breathing, and recovery-position practice. Their size feels more realistic during team exercises.

Child and infant manikins help learners adjust hand placement, compression depth, and ventilation technique. They are essential for childcare workers, parents, and pediatric responders. Basic manikins offer simple, affordable repetition. Feedback-enabled models display compression rate, depth, recoil, and hand position. Airway-training models may show visible chest rise or incorrect head tilt. Some advanced units support scenario training with changing responses, but they need careful setup and regular inspection.

Tips: Match the manikin to the learner group and local CPR protocol. Check skin surfaces, airways, valves, and feedback sensors before every session. Replace worn parts promptly. Ask instructors whether the display improves learning or distracts beginners. No manikin is perfect. Even realistic devices cannot reproduce panic, clothing, body weight, or a noisy emergency scene. Buyers should also consider cleaning procedures, spare-part availability, language options, storage temperature, and instructor training. A lower purchase price can become expensive when maintenance is overlooked.

Essential Features for Realistic and Effective CPR Practice

Top 10 CPR Training Manikins for Global Buyers

A realistic manikin should make learners work, not simply pass a test. The American Heart Association’s 2020 Guidelines recommend chest compressions at 100–120 per minute. Adult compression depth should reach at least 5 centimeters, without exceeding 6 centimeters. Therefore, buyers should choose models with measurable depth, release, rate, and hand-position feedback.

The best training manikins provide visible chest rise after correct ventilation. They also simulate airway blockage, head-tilt response, and realistic chest resistance. Feedback matters. A clear display or mobile-free indicator can support training in regions with limited connectivity. Adult, child, and infant versions are valuable because body size changes compression technique. The World Health Organization reported that cardiovascular diseases caused approximately 17.9 million deaths worldwide in 2019, showing why accessible CPR education remains important.

For global use, durable skin materials, replaceable lungs, washable surfaces, and low-cost maintenance deserve serious attention. A manikin should also tolerate repeated sessions without losing recoil accuracy. Realism has limits. Some products feel too stiff, while others make compressions unrealistically easy. Buyers should request calibration evidence, cleaning instructions, warranty terms, and language-neutral feedback before purchasing. I would also test the unit with novice learners, not only instructors. Their confusion often reveals design problems that product sheets hide.

How to Compare Quality, Certification, Cost, and Maintenance

Top 10 CPR Training Manikins for Global Buyers

How to Compare Quality, Certification, Cost, and Maintenance

When comparing CPR training manikins, quality should reflect real teaching conditions. Check chest stiffness, recoil, airway response, and skin durability. A reliable manikin should provide consistent compression depth and ventilation feedback across repeated sessions. Test the unit with several learners, not only during a supplier demonstration. Small differences become obvious after a full training day.

Certification requires careful verification. Ask for current test reports, conformity documents, and the standards used for design and safety. Requirements may differ between countries and purchasing institutions. Do not accept a generic certificate without checking its scope, issuing body, and product model. That mistake can delay customs clearance or internal approval. Certification is not the same as clinical validation.

Cost includes more than the purchase price. Compare replacement lungs, faces, batteries, software access, shipping, and technician support. A low-priced model may become expensive after frequent part replacement. Maintenance should be practical: smooth surface cleaning, accessible airway components, clear calibration instructions, and available spare parts. In my procurement experience, training centers often underestimate storage conditions and cleaning time. We also once favored advanced feedback features before confirming instructor needs. That decision was costly and unnecessary. A simple inspection checklist, tested quarterly, can reveal damaged springs, weak sensors, or inaccurate feedback before the next class.

Top 10 CPR Training Manikins for Global Buyers - How to Compare Quality, Certification, Cost, and Maintenance
No. Manikin Type Best Use Key Quality Indicators Certification and Compliance Evidence to Request Typical Purchase Cost
(USD, excluding freight and tax)
Typical Maintenance Requirements Main Advantages and Limitations
1 Basic Adult CPR Manikin Introductory CPR classes, schools, community training Anatomically recognizable torso, realistic chest resistance, visible chest rise, replaceable face shield and lungs Request documented compliance with the training provider's current CPR performance requirements; verify material safety documentation and electrical safety if powered $180–$450 Replace face shields and lungs after each learner or according to the infection-control policy; clean the skin and airway surfaces after every session Lowest acquisition cost and simple operation; usually provides limited feedback and fewer child or infant functions
2 Adult CPR Manikin with Mechanical Feedback High-volume training centers and standardized skills assessment Audible or visual indicators for compression depth, rate, recoil, hand position and ventilation volume Ask for calibration information, measurement tolerances, software documentation and evidence that feedback targets can be configured to the selected guideline set $400–$1,100 Routine cleaning, sensor inspection and periodic calibration checks; replace batteries and airway components as specified by the supplier Improves learner feedback without requiring a tablet; mechanical indicators may be less detailed than digital systems
3 Adult CPR Manikin with Digital Feedback Professional education, instructor-led assessment and blended learning Real-time app or monitor feedback, data storage, adjustable performance targets and learner reporting Verify software version control, data-security practices, device compatibility, electrical compliance and documented validation of measurement accuracy $900–$2,500 Clean and disinfect all contact surfaces; update software; charge or replace batteries; inspect sensors and connectivity before each course Detailed measurement and reporting; higher cost, greater setup complexity and possible dependence on proprietary software
4 Full-Body Adult CPR and AED Manikin Workplace, public-access defibrillation and emergency-response drills Full-body positioning, realistic airway opening, palpable pulse options, visible chest rise and replaceable AED training pads Request evidence that the AED trainer interface is compatible with the intended training protocol; check electrical safety and applicable regional product-marking requirements $700–$2,000 Disinfect the entire body surface; replace AED pads, batteries, airway parts and damaged clothing; inspect connectors and training electrodes Supports realistic team scenarios; heavier, more expensive to transport and slower to clean than a torso-only unit
5 Child CPR Manikin Pediatric CPR and foreign-body airway-obstruction training Child-sized anatomy, age-appropriate compression resistance, visible chest rise and realistic airway alignment Verify that the device is designed for the selected pediatric CPR curriculum; request material safety and cleaning compatibility documents $350–$900 Use a dedicated child airway system; replace lungs and face shields as required; clean surfaces after each learner and inspect airway valves regularly Provides more appropriate pediatric practice than an adult unit; cannot fully replace infant and adult training equipment
6 Infant CPR Manikin Infant CPR, choking response and caregiver education Infant proportions, flexible neck, realistic chest compliance, visible chest rise and appropriate ventilation resistance Request curriculum alignment information, material safety documentation and cleaning instructions for infant airway components $250–$700 Replace or disinfect airway components between learners; clean the face and torso; inspect the neck hinge and ventilation pathway frequently Essential for age-specific technique; smaller anatomy can be more delicate and replacement airway parts may cost more per unit
7 Trauma and Airway Management Manikin Advanced emergency-care, airway and resuscitation scenarios Airway obstruction options, head-tilt/chin-lift response, intubation access, ventilation feedback and replaceable internal components Ask for evidence of compatibility with the airway devices used in training and documentation covering materials, cleaning agents and component replacement $1,200–$4,000 Thorough cleaning of airway passages; lubrication where specified; inspection of valves, connectors and replaceable airway structures after each session Broad clinical training capability; higher price, more consumables and a steeper instructor learning curve
8 Portable Torso CPR Manikin Mobile instructors, small classrooms and international shipment Lightweight construction, durable carry case, stable base, adequate chest resistance and quick replacement of airway parts Verify packing specifications, product materials, applicable import documents and performance evidence for the intended CPR curriculum $150–$500 Clean after every class; store in a dry carry case; inspect hinges, base stability, lungs and face shields before transport Easy to transport and economical; reduced realism for patient positioning, AED drills and full-body teamwork
9 Multi-Age CPR Training Set Training providers serving adult, child and infant learners Consistent construction across age groups, interchangeable feedback systems, durable storage and standardized replacement parts Review compliance documents for each unit, not only the set; confirm that all age configurations support the selected course standards $900–$3,000 per set Maintain separate cleaning and replacement schedules for each age group; label parts clearly and inspect the complete set before every course Covers multiple learner needs and improves purchasing efficiency; larger storage requirement and higher initial investment
10 High-Fidelity Scenario Manikin Hospitals, simulation centers and multidisciplinary team training Computer-controlled vital signs, programmable scenarios, speech or breath sounds, CPR quality data and instructor debriefing tools Request electrical and radio-compliance documents where applicable, software and cybersecurity information, calibration records and technical-service documentation $8,000–$80,000+ Scheduled preventive servicing, software updates, sensor calibration, battery care and replacement of skin, airway and electronic modules by trained technicians Highest realism and scenario flexibility; significant capital cost, training requirements, service dependency and total cost of ownership
Cost ranges are indicative global purchasing ranges for new equipment and vary by configuration, feedback technology, accessories, shipping, duties and service contracts. CPR manikins do not have one universal worldwide certification; buyers should verify applicable local regulations and the current requirements of the training organization before purchase.

Selecting the Right CPR Training Manikin for Different Markets

Selecting the right CPR training manikin depends on the market, not only the purchase price. Adult models suit workplace and community courses, while child and infant models support schools, hospitals, and family education. A mixed training center may need several body sizes. Check the chest resistance, airway response, and compression depth carefully. These details affect learner confidence.

Local conditions also matter. In hot regions, choose durable materials that tolerate frequent transport and storage. In busy training centers, removable skin and washable surfaces can reduce maintenance time. Feedback systems should offer clear visual or audio guidance, especially where instructors manage large classes. However, advanced electronics may create repair challenges in markets with limited technical support. Simple designs can be more reliable.

Language and teaching habits deserve attention. Controls, software, and instructions should match local users whenever possible. Confirm that the manikin supports the training protocols accepted by the target market. Procurement teams should also review replacement parts, warranty terms, cleaning procedures, and instructor training. From practical evaluations, a realistic chest feel often matters more than impressive digital features. That judgment is not universal. Some buyers may value data tracking for certification records. A perfect manikin does not exist. The best choice balances realism, durability, service access, learner age, and local budgets. Test it with real instructors before ordering large quantities.

FAQS

What compression performance should a realistic adult CPR manikin support?

It should measure rates between 100 and 120 compressions per minute. Adult compression depth should reach at least 5 centimeters. It should not exceed 6 centimeters. Accurate recoil matters too.

Which feedback features are most useful during CPR practice?

Choose feedback for compression depth, release, rate, and hand position. Visible chest rise should follow correct ventilation. Clear indicators help in areas with limited connectivity. Too many features can confuse beginners.

Should buyers choose adult, child, or infant manikins?

Ideally, training centers should provide all three body sizes. Compression technique changes with age and body size. A child model needs different pressure from an adult model. Infant practice is different. One size is insufficient.

How can buyers judge physical realism before purchasing?

Check chest resistance, recoil, airway response, and head-tilt behavior. The chest should not feel extremely stiff or unusually easy. Ask learners to test it, not only instructors. Their confusion may reveal hidden design problems.

What materials and maintenance features should a manikin include?

Durable skin, washable surfaces, and replaceable lungs support repeated training. Airway components should be easy to access and clean. Request cleaning instructions and spare-part availability. Maintenance time is often underestimated. Storage conditions matter.

How should buyers verify certification documents?

Request current test reports, conformity documents, and the design standards used. Check the document’s scope, issuing body, and exact product model. A generic certificate may not support approval. Certification does not equal clinical validation. Check carefully.

What costs should be included beyond the purchase price?

Compare replacement lungs, faces, batteries, software access, shipping, and technical support. A cheaper unit may require frequent part replacement. Those small expenses can accumulate after many classes. Calculate the full maintenance cost before deciding.

How can training centers check a manikin’s condition over time?

Use a simple inspection checklist every quarter. Check springs, sensors, recoil, skin condition, and feedback accuracy. Run repeated compressions and ventilations before the next class. Keep written results. Some problems appear late.

Conclusion

Choosing the right Cpr Training Manikins is essential for delivering consistent, realistic, and effective CPR education across international markets. This guide examines what makes a manikin suitable for global buyers, including durability, portability, user safety, instructional versatility, and compatibility with different training environments. It introduces key types, such as adult, child, infant, torso, and full-body models, explaining how each supports specific learning objectives and emergency practice scenarios.

The article also highlights essential features for realistic training, including visible chest rise, accurate compression feedback, airway management functions, replaceable components, and easy cleaning. Buyers will learn how to compare product quality, certifications, total cost, warranty coverage, and maintenance requirements rather than focusing only on the initial price. Finally, it offers practical guidance for selecting manikins according to regional budgets, class sizes, training standards, transport needs, and long-term service expectations, helping organizations make informed purchasing decisions.


Oliver

Oliver

Oliver is a seasoned marketing professional with a wealth of expertise in driving brand awareness and engagement. With a deep understanding of our company's product offerings, he consistently delivers high-quality content that enriches our professional blog. His insights not only shed light on......