Why Choose Resuscitation Manikins for CPR Training?

Time:2026-10-31 Author:Henry
0%

Resuscitation Manikins turn CPR instruction into deliberate, hands-on practice. Trainees can kneel beside a torso, position their hands, and feel resistance during each compression. Many models provide feedback on compression depth, rate, and recoil. That immediate signal can help learners correct technique before errors become habits. Dr. Peter Safar, a pioneer of modern resuscitation, captured the urgency of action: “Anyone, anywhere, can now initiate cardiac resuscitation.”

Practice matters. Reading alone is not enough.

For instructors, manikins offer a repeatable way to teach and assess core CPR skills. A class can practise chest compressions, rescue breaths, and coordinated team responses without placing a patient at risk. Some systems record performance, giving learners and trainers concrete points to review. The details count: hand placement, steady rhythm, and allowing the chest to recoil. Still, a feedback score is not the whole story. A manikin cannot reproduce the uncertainty, noise, or emotional pressure of a real emergency.

Choosing Resuscitation Manikins means choosing tools that support safe rehearsal, not a guarantee of perfect performance. Features should match the learners, course goals, and teaching setting. A basic model may suit introductory practice; advanced feedback can help with structured assessment. I would also leave room for reflection: learners can improve, yet confidence may fade without refreshers. Effective training combines realistic practice, clear coaching, and repeated opportunities to build skill.
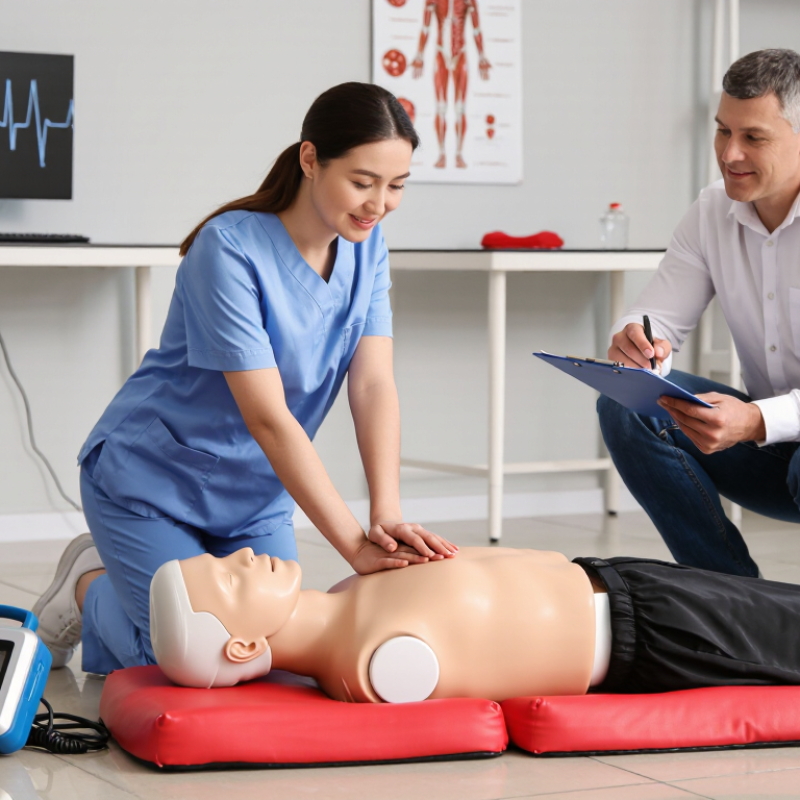
Why Choose Resuscitation Manikins for CPR Training?

What Resuscitation Manikins Are and How They Support CPR Training

Resuscitation manikins are practice models used to rehearse CPR without placing a real person at risk. They may represent an adult, child, or infant, with a torso, face, and airway designed for hands-on practice. Some have movable chests and simple indicators; advanced models can record compression depth, rate, and release. The details differ.

They make abstract instructions physical. Trainees place their hands at the center of the chest, press, and observe how the chest responds. A light may signal adequate depth, while a display can reveal compressions that are too shallow or fast. Learners can also practice opening the airway and giving breaths, depending on the model and course. Immediate feedback helps instructors correct hand position and pacing before habits settle.

Practice still takes attention. A manikin cannot reproduce fear, movement, or the feel of a real emergency. Its feedback may also be simplified, so learners should ask what each indicator measures. That small pause matters. Used with qualified instruction and repeated practice, manikins help learners build coordination, confidence, and a clearer sense of CPR rhythm.

Which CPR Skills Learners Can Practise on Manikins

Why Choose Resuscitation Manikins for CPR Training?
Which CPR Skills Learners Can Practise on Manikins

A manikin lets learners practise hand placement and chest compressions without risking harm to a patient. They can feel how posture, arm position, and steady pressure affect each push. The American Heart Association’s 2020 CPR and ECC Guidelines recommend a compression rate of 100–120 per minute and adult compression depth of 5–6 centimetres. Those targets are easier to understand when learners practise, receive feedback, and adjust their technique.

Small details matter. Learners can practise allowing the chest to recoil fully, switching compressors, and keeping pauses brief. They can also rehearse rescue breaths and the 30:2 compression-to-ventilation ratio for single-rescuer adult CPR. A training AED lets them practise following prompts, placing pads correctly, and resuming compressions promptly after a shock. Repetition helps make these steps more familiar under pressure.

A useful session includes feedback, not just repetition. Instructors can point out shallow compressions or rushed breaths, then invite learners to try again. It feels awkward at first. That is worth noticing: a manikin cannot recreate fear, fatigue, or a patient’s changing condition. The ILCOR Consensus on Science with Treatment Recommendations supports high-quality CPR as a core resuscitation priority, while hands-on practice helps learners work toward measurable technique. Reviewing mistakes openly can make training more realistic and useful.

Why Choose Resuscitation Manikins for CPR Training? - Which CPR Skills Learners Can Practise on Manikins

CPR Skill What Learners Practise Useful Manikin Features Key Practice Point
Chest-compression hand placement Finding the correct area on the chest and positioning the hands before compressions. Clearly defined chest landmarks or a replaceable chest skin. For adult CPR, place the heel of one hand in the centre of the chest, on the lower half of the breastbone, with the other hand on top.
Compression rate and rhythm Delivering compressions at a steady, consistent pace. Metronome guidance or electronic rate feedback, when available. Current CPR guidance commonly recommends 100–120 compressions per minute for adults.
Compression depth Practising compressions deep enough to produce effective chest movement without excessive depth. Depth indicators or feedback sensors on equipped models. For an average adult, compress about 5–6 cm (2–2.4 inches), following the applicable training guidance.
Full chest recoil Releasing pressure completely between compressions while keeping hands positioned correctly. Feedback systems that identify incomplete release, if fitted. Allow the chest to return to its normal position after each compression; avoid leaning on the chest.
Compression-to-ventilation sequence Practising the timing and transition between chest compressions and rescue breaths. Adult, child or infant manikins matched to the lesson. A common adult CPR sequence for a single rescuer is 30 compressions followed by 2 breaths.
Rescue breaths Opening the airway and giving breaths while observing for visible chest rise. Airway anatomy and a chest that rises when breaths are delivered correctly. Each breath is generally given over about 1 second, with only enough air to make the chest visibly rise.
AED pad placement Locating and placing training AED pads in the positions shown by the AED instructions. Compatible training pads or a practice AED, where supplied. Follow the device prompts and ensure pads are placed on the exposed chest in the positions indicated.
Age-appropriate CPR Adapting hand position, compression depth and technique for adult, child or infant scenarios. Different-sized manikins or interchangeable age-specific components. Children and infants require age-appropriate technique; follow the course protocol rather than applying adult measurements.
Team communication and role changes Coordinating compressions, breaths, AED use and rescuer changes during a simulated response. Manikins suitable for group scenarios, with optional feedback equipment. Clear communication and brief, organised transitions help limit interruptions to compressions.

Training note: Manikins allow learners to practise skills without risk to a patient. Available feedback varies by model, and learners should follow the current guidance and protocols taught by their CPR training provider.

How Feedback Features Help Improve Compression Technique

Why Choose Resuscitation Manikins for CPR Training?
How Feedback Features Help Improve Compression Technique

A resuscitation manikin turns instructions into a physical task: hands centered on the chest, shoulders above wrists, steady pressure. Feedback-enabled models can show whether compressions are deep enough, too fast, or interrupted. Learners see results while practicing, rather than several minutes later. That immediate signal helps connect hand movements with performance. It also gives instructors clear points to coach, such as allowing full chest recoil.

Small adjustments matter. A display or sound cue may prompt learners to slow down, reposition their hands, or release pressure between compressions. Repeating the movement helps build consistency under supervision. Yet feedback is not a verdict. Sensors may vary, and learners can chase a score while losing rhythm or coordination. A score can still distract. Combine device cues with instructor observation, realistic practice scenarios, and current CPR guidance. Manikins support training; they do not replace qualified instruction or sound judgment.

Tips: Check the device setup before practice. Watch for full chest recoil after each compression. Ask an instructor to review hand position, even when the indicator looks correct. Short practice rounds with specific feedback can reveal habits a single score misses.

Why Choose Resuscitation Manikins for CPR Training?

Feedback features help learners monitor compression rate and adjust their technique in real time.

The shaded band shows the recommended adult CPR compression rate of 100–120 compressions per minute. The plotted readings are illustrative, not results from a clinical study. A feedback-enabled manikin can help learners recognize when their rate falls outside the target range and correct it during practice.

Guideline reference: American Heart Association adult CPR guidance recommends a compression rate of 100–120/min.

How Manikins Enable Safe, Repeatable Training Scenarios

A CPR class works best when learners can make mistakes without risking a patient. A manikin provides a stable surface, a clear chest landmark, and a safe way to repeat compressions. Learners can adjust hand position, depth, and rhythm, then try again. No ambulance, no real emergency. The repetition is the point.

For adult CPR, the 2020 American Heart Association Guidelines recommend compressions at 100–120 per minute and a depth of about 5–6 cm. A manikin with feedback can help learners see whether their rate and depth match those targets. Instructors can pause a scenario, correct technique, and restart it consistently. That makes progress easier to observe than relying on memory alone. Still, manikins are not patients. They cannot reproduce fear, pain, or every body shape, and a tidy practice room may create false confidence. That limitation matters. Training should include varied scenarios and honest feedback, not just a high score. AHA guidance supports feedback devices as a useful training aid, but equipment does not replace skilled instruction or continued practice.

What to Consider When Choosing a Resuscitation Manikin

A useful resuscitation manikin should match the people and skills your learners will practise with. Adult-only courses may need a different setup from programmes that include infants or children. Check that the model supports the techniques in your training plan, including chest compressions, rescue breaths, and airway positioning where appropriate.

Fit matters. A manikin that sits securely on a classroom floor and allows clear hand placement can make practice smoother. Look for feedback on compression depth, rate, and recoil, but check whether instructors can adjust or explain the settings. Beep-driven practice is not always helpful. Some learners focus on the sound instead of their hand position. Feedback should support coaching, not replace it.

Consider cleaning, replacement parts, storage, and transport before choosing. Shared equipment needs surfaces and airways that can be cleaned according to the manufacturer’s instructions. Ask how often consumable parts need replacing and whether routine checks are manageable for your staff. Realism also deserves careful thought: a manikin can teach repeatable technique, but it cannot reproduce every body shape or response. That limitation is easy to overlook. If possible, let instructors test the model with a short practice session and note what feels awkward, unclear, or distracting.

FAQS

What is a resuscitation manikin?

It is a practice model for rehearsing CPR without placing a real person at risk. Some models represent adults, children, or infants.

Which CPR skills can learners practise?

Learners can practise hand placement, chest compressions, chest recoil, and rescue breaths. Some courses also include switching compressors and using a training AED.

What compression rate and depth are commonly practised for adults?

Adult CPR training commonly uses 100–120 compressions per minute and a depth of 5–6 centimetres. Follow the guidance taught by your qualified instructor.

How does manikin feedback help?

Lights, sounds, or displays can show whether compressions are too shallow, too fast, or interrupted. That immediate cue helps learners adjust their hand position and pace.

Can manikins show whether CPR technique is perfect?

No. Sensors and indicators may simplify performance, and a good score is not the whole story.

Why practise chest recoil?

Releasing pressure lets the chest return between compressions. Learners can watch for that movement after each push.

Can a manikin reproduce a real emergency?

No. It cannot recreate fear, fatigue, movement, or a patient’s changing condition. That gap is worth remembering.

How can instructors make practice more useful?

They can observe hand position, compression rhythm, and pauses, then give specific feedback. Short practice rounds help reveal habits that one score may miss.

Conclusion

Resuscitation Manikins provide a practical way for learners to develop CPR skills in a structured training environment. They allow participants to practise essential steps such as assessing a person, positioning their hands, performing chest compressions, and coordinating actions with others. Repeating these steps helps learners build confidence and become more familiar with the rhythm and sequence of CPR.

Some manikins include feedback features that indicate compression depth, rate, or hand placement, helping learners recognise where their technique can improve. Manikins also make it possible to practise consistent, realistic scenarios safely and repeatedly, without putting another person at risk. When choosing a resuscitation manikin, consider the learners’ experience and training goals, the skills that need to be practised, the available feedback, and how easy the manikin is to set up and maintain.


Henry

Henry

Henry is a dedicated marketing professional with a profound expertise in the company's offerings. With years of experience in the industry, he possesses an impressive understanding of the market dynamics and consumer behaviors that drive success. Henry is committed to sharing his insights through......